Unlock Takeout Magic: Make Sweet & Sour Chicken That Rivals Your Favorite Spot
There’s a universal craving that often strikes after a long day: the distinct sweet, tangy, and savory symphony of sweet sour chicken. It’s a classic for a reason, but the thought of recreating that authentic takeout experience at home often feels daunting. Visions of deep fryers, specialized woks, and complicated recipes might dance in your head, pushing you straight to the delivery app. What if we told you that achieving that glossy, flavorful, *sweet sour chicken* you adore is not only possible but surprisingly easy, requires no deep frying, and can be ready in a mere 25 minutes?
Forget the fear of intimidating kitchen gadgets or greasy clean-ups. This comprehensive guide will show you how to master homemade sweet sour chicken – a dish that boasts a lightly crisp texture, a perfectly balanced sauce, and vibrant vegetables, all without a single drop of deep-fried oil. Get ready to swap the delivery menu for your own culinary creation, proving that a truly satisfying, better-than-takeout meal is just a quick skillet cook away.
Why Skip the Fryer? Embrace the Speed & Health of No-Fry Sweet Sour Chicken
The allure of crispy chicken is undeniable, but the traditional deep-frying method comes with a few drawbacks: added fats, a messy cleanup, and a time commitment that often defeats the purpose of a quick weeknight meal. Our approach to homemade sweet sour chicken sidesteps these issues entirely, offering a superior alternative that’s both quicker and healthier, without sacrificing an ounce of flavor or texture.
Here’s why embracing the no-fry method for your sweet sour chicken is a game-changer:
*
Healthier Choice: By pan-searing or skillet-cooking your chicken, you significantly reduce the amount of oil used, making for a lighter, less guilt-inducing meal. This doesn't mean compromising on taste; instead, it allows the vibrant flavors of the sauce and fresh ingredients to shine through.
*
Unbeatable Speed: With no need for oil to heat up to precise temperatures, deep-frying, or excessive clean-up, this recipe truly comes together in about 25 minutes. It’s faster than most deliveries and perfect for those busy evenings when you crave something special but are short on time.
*
Minimal Mess: Say goodbye to splattering oil and cumbersome equipment. A single skillet or a large non-stick pan is all you need, streamlining both the cooking process and the aftermath.
*
Retained Texture: Our secret to "crispy" chicken without the fryer ensures a delicate, slightly crunchy exterior that beautifully absorbs the tangy sauce, mimicking that beloved takeout mouthfeel.
*
Full Control: Making your sweet sour chicken at home gives you complete control over ingredients. You can customize the sweetness or tanginess of the sauce, choose fresh, high-quality chicken, and load up on your favorite vegetables, avoiding artificial colors or excessive sodium often found in restaurant versions.
This skillet-based method is a testament to how home cooking can truly elevate a classic dish, making it accessible, enjoyable, and a regular feature on your dinner rotation. For a deeper dive into how this quick skillet method works, explore our article:
Skip the Fryer: Easy Skillet Sweet Sour Chicken in 25 Mins.
The Heart of the Dish: Crafting Your Signature Sweet & Sour Sauce
The soul of any fantastic sweet sour chicken lies in its sauce. It’s a delicate dance of flavors – the irresistible balance of sweet, tangy, and a hint of savory that coats every piece of chicken and vegetable with a glossy, clingy perfection. Achieving this balance is simpler than you might think, and the beauty of homemade is the ability to tailor it precisely to your palate.
Most authentic sweet sour sauces feature a core combination of ingredients:
*
Pineapple Juice: Provides natural sweetness and a subtle fruitiness, a hallmark of classic sweet and sour.
*
Rice Vinegar: Essential for that characteristic tangy kick. Regular white vinegar can work in a pinch, but rice vinegar offers a milder, more authentic flavor profile.
*
Soy Sauce: Adds depth, umami, and a savory counterpoint to the sweetness.
*
Ketchup: Often surprising, ketchup contributes a rich tomato base, a touch of sweetness, and helps achieve that vibrant reddish-orange hue without artificial food coloring.
*
Sugar: Balances the acidity of the vinegar and enhances the overall sweetness. Brown sugar, honey, or maple syrup can also be used for varied flavor notes.
*
Cornstarch Slurry: This is the magic ingredient for thickening. A simple mix of cornstarch and cold water, added at the end, transforms the liquid into that coveted glossy, sticky glaze that adheres beautifully to the chicken and vegetables.
Tips for Sauce Perfection:
1.
Taste and Adjust: Don't be afraid to taste your sauce before thickening it. Need more tang? Add a splash more vinegar. Prefer it sweeter? A little more sugar. This is your kitchen, your rules!
2.
Achieve the Perfect Gloss: Once the cornstarch slurry is added, stir constantly over medium heat. The sauce will rapidly thicken and become beautifully glossy. Cook until it reaches your desired consistency – thick enough to coat, but still pourable.
3.
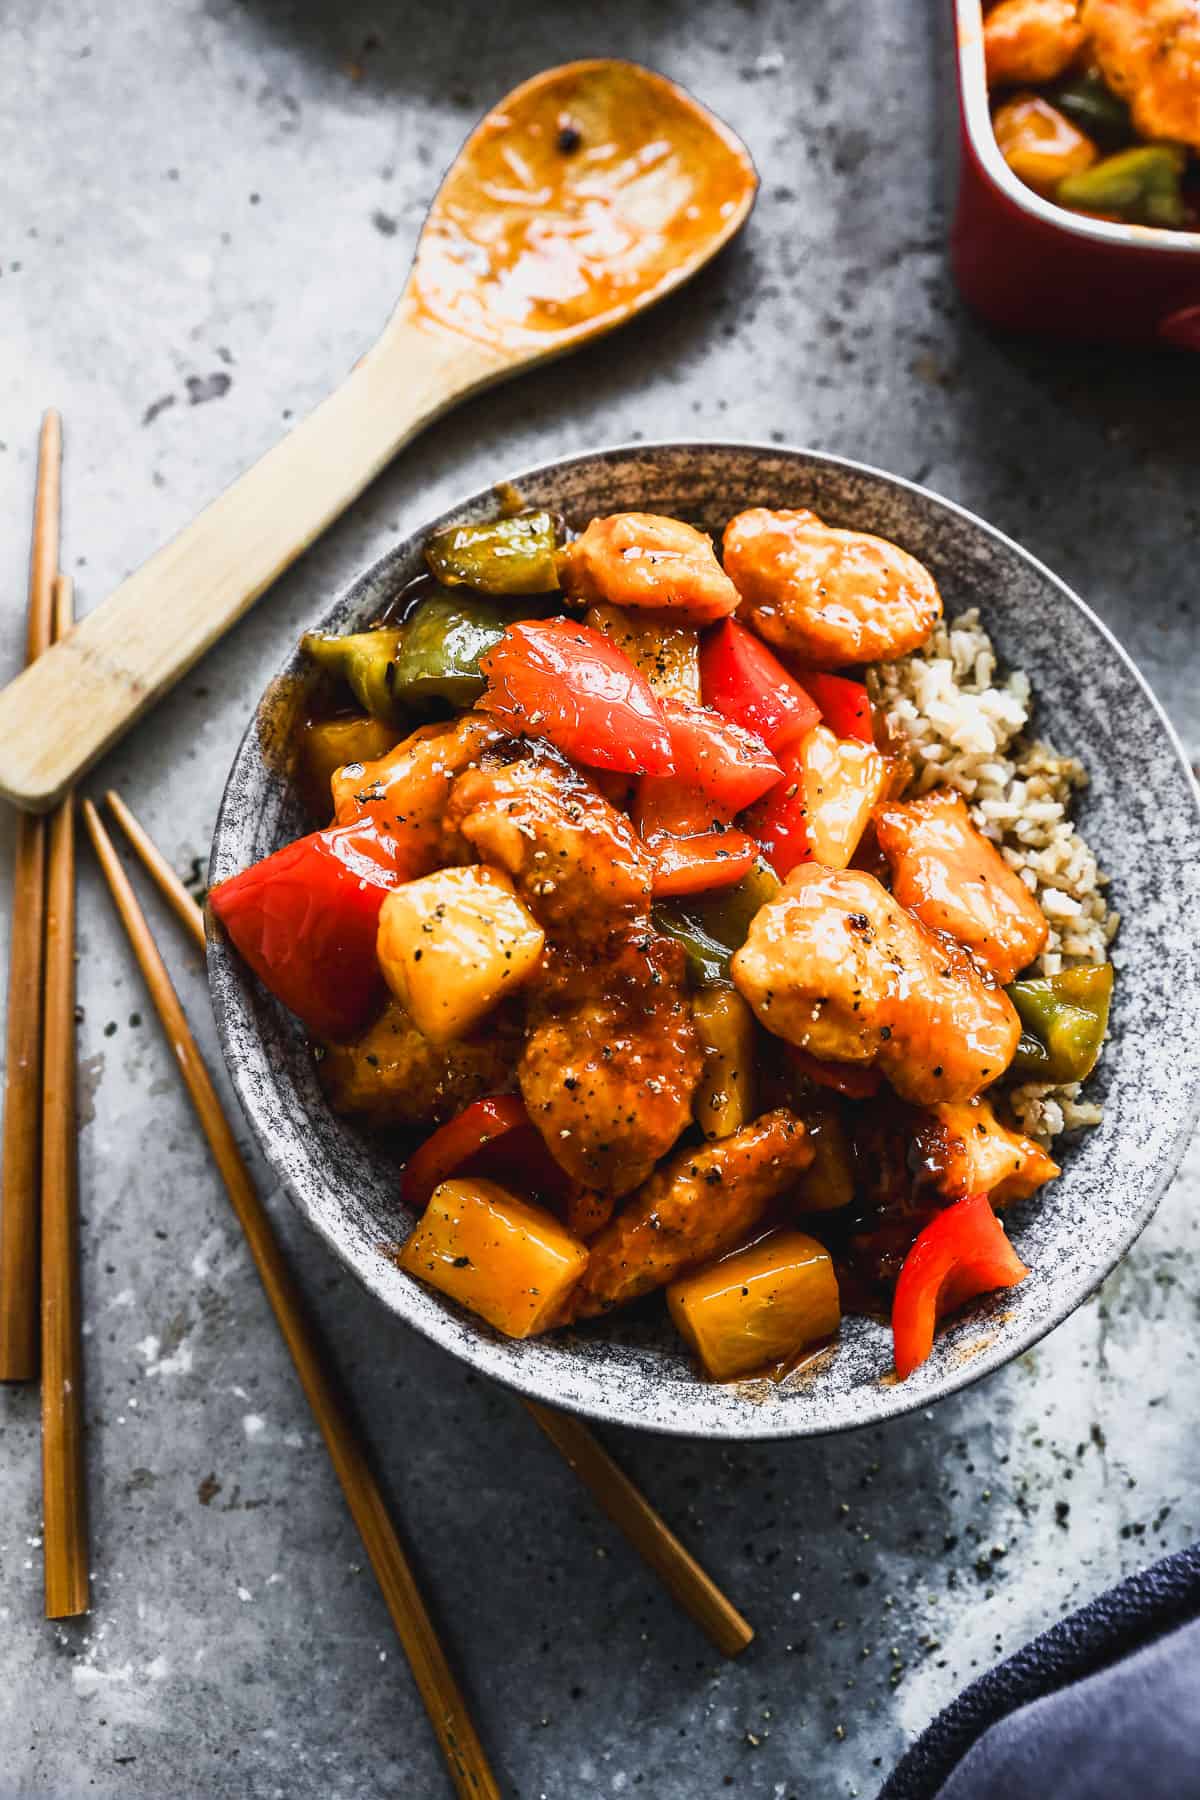
Consider Your Add-ins: While the sauce is the star, the classic sweet sour experience is elevated by colorful vegetables and pineapple. Bell peppers (red, green, yellow for variety), onion, and juicy pineapple chunks are non-negotiable for their flavor, texture, and visual appeal. For an extra kick, a pinch of red pepper flakes can be stirred into the sauce.
The "Crispy" Secret: Mastering No-Fry Chicken Without the Fuss
The biggest hurdle for many home cooks attempting sweet sour chicken without a deep fryer is achieving that coveted crispy texture. But rest assured, there's a simple, brilliant trick that delivers a lightly crisp coating, even when pan-searing.
The secret lies in a quick and effective
cornstarch dredge. Here’s how it works:
1.
Prep Your Chicken: Start with boneless, skinless chicken breast or thigh, cut into uniform 1-inch pieces. Pat the chicken thoroughly dry with paper towels. This is crucial, as excess moisture can prevent a good coating and sear.
2.
The Cornstarch Coat: Toss the dried chicken pieces in a bowl with cornstarch until each piece is lightly and evenly coated. You can add a pinch of salt and pepper to the cornstarch for seasoning. This thin layer of cornstarch forms a protective barrier that crisps up beautifully when cooked, creating a delicate, almost "tempura-like" crust.
3.
Sear in a Hot Skillet: Heat a couple of tablespoons of high-smoke-point oil (like vegetable, canola, or grapeseed) in a large non-stick skillet over medium-high heat. Once shimmering, add the cornstarch-coated chicken in a single layer, ensuring not to overcrowd the pan. Cooking in batches is key to prevent steaming and encourage browning.
4.
Achieve Golden Perfection: Cook each side for 3-4 minutes until golden brown and cooked through. The cornstarch will transform into a delightful, thin crisp that holds its texture even after being tossed in the tangy sauce.
This method delivers on the promise of a satisfying crunch, allowing you to enjoy the full textural experience of sweet sour chicken without the oil and fuss of deep frying. For more detailed tips on getting that perfect crisp without the fryer, check out our guide:
Better Than Takeout Sweet Sour Chicken: Crispy & Tangy at Home.
Your 25-Minute Journey to Sweet & Sour Bliss
With your chicken prepped and your sauce ingredients ready, assembling your sweet sour chicken masterpiece is a breeze. The beauty of this recipe lies in its efficiency, allowing you to get a complete, flavorful meal on the table faster than calling for delivery.
Here's a simplified rundown of your culinary journey:
1.
Prep & Sear the Chicken: As outlined above, dredge your chicken pieces in cornstarch and sear them until golden and cooked through. Remove them from the pan and set aside.
2.
Sauté the Veggies: In the same skillet, add a little more oil if needed, then quickly sauté your chopped bell peppers, onions, and any other desired vegetables (like snow peas or thinly sliced carrots) until tender-crisp, about 3-5 minutes. Add the pineapple chunks in the last minute of cooking.
3.
Whisk & Add the Sauce: While the vegetables are cooking, whisk together all your sweet and sour sauce ingredients in a bowl. Pour the sauce directly into the skillet with the vegetables.
4.
Thicken & Combine: Bring the sauce to a gentle simmer, stirring constantly, until it thickens and becomes glossy. This usually takes less than 3 minutes.
5.
Toss & Serve: Return the seared chicken to the skillet, tossing everything gently to ensure every piece is beautifully coated in the sticky, vibrant sweet and sour glaze.
Serve your homemade sweet sour chicken immediately over fluffy steamed white rice, brown rice, or even a bed of noodles for a truly authentic experience. Garnish with sesame seeds or chopped green onions for an extra touch of flair and freshness.
Pro Tips for Success:
*
Meal Prep Friendly: You can chop your vegetables and mix your sauce components a day ahead. Store them separately in the refrigerator, making your 25-minute cook time even more efficient.
*
Customize Your Veggies: Feel free to experiment with other quick-cooking vegetables like snap peas, broccoli florets, or even mushrooms.
*
Sweet and Sour Variations: This same no-fry technique and sauce base can be adapted for sweet and sour pork, shrimp, or even firm tofu for a vegetarian option.
Conclusion: Your Kitchen, Your Sweet & Sour Victory
You no longer need to rely on takeout for that incredible sweet sour chicken experience. By following these simple, no-fry techniques, you can recreate the classic flavors, textures, and vibrant appeal right in your own kitchen, often faster and healthier than ordering in. This 25-minute meal is a testament to the power of smart cooking – delivering a lightly crisp chicken, a perfectly balanced sweet and tangy sauce, and colorful vegetables, all from scratch.
Embrace the joy of cooking this beloved dish at home. It’s a rewarding experience that proves delicious, authentic flavors don't require complex methods or deep fryers. So, next time that sweet sour chicken craving hits, reach for your skillet, not your phone, and enjoy a meal that truly tastes better than takeout, made on your terms.